Starter Guide: How to Create a Webinar Registration Form

Are you thinking about hosting a webinar or virtual event? With many in-person events currently cancelled, providing an online experience can be a great alternative. And with Gravity Forms you can easily create a user-friendly webinar registration form to register attendees for your online gathering.
In this Starter Guide we look at how you can take the Gravity Forms webinar registration form template and customize it to suit your exact needs. We also discuss some of the Gravity Forms Add-Ons that you may want to use to help you manage leads and take payments via your form, as well as some further third-party integrations to enhance the webinar registration process.
Hosting a Webinar
Hosting a webinar can have numerous benefits for your business as it is an effective way to collect leads, connect with your target audience, establish yourself as an expert in your industry, and promote your products or services. In the current climate, it is also an ideal option for keeping in contact with your client base as well as continuing to run your events – just online instead of in-person.
When creating a registration form for your webinar or online event, here are a few points to consider…
- Gather Information on Your Attendees – When running any event, digital or in-person, you want to make sure that the content you deliver is relevant and useful for your audience. Understanding who your audience is, and what they want to get out of your event, will help you to tailor the presentation to their needs. Therefore, although you don’t want your webinar registration form to be too long, it is worth asking some key questions within the form so you have a clear background on your audience before the event starts. Think carefully about what information you need to know that will really help you plan a successful webinar, and then work those questions into your registration form.
- Manage Your Leads – One of the key reasons most companies run webinars is to generate leads. Gravity Forms is the best tool for this job, as our intuitive form builder will enable you to create beautiful and user-friendly forms that convert. However, once those leads have been collected, you don’t want to keep them hidden away within your WordPress dashboard. Instead we recommend you integrate your form with an email marketing service or CRM, enabling you to easily manage and nurture those contacts, turning email addresses into loyal customers. Gravity Forms integrates with a wide assortment of email marketing services and CRMs including Mailchimp, AWeber, Campaign Monitor, and HubSpot – all available on our Basic License.
- Accept Payments – If you want to charge participants for attending your webinar or online event then Gravity Forms makes it easy for you to take payments via your form. Gravity Forms integrates with a wide assortment of payment processors including Stripe, PayPal, Square, Authorize.net, Mollie, and more. So whether you need to accept major credit cards or local currencies, or take payments within the US or globally, we have a payment processor that will work with your registration form. The majority of our payment Add-Ons are available on our Pro license so if taking payments is a feature you need, make sure you check our Pro plan page.
Most webinar platforms do provide some type of registration form, but these are often limited in functionality. If you want to create a user-friendly form, using fields and integrations that are relevant to your business and audience, and that you can display directly on your site, then Gravity Forms is the form builder for you.
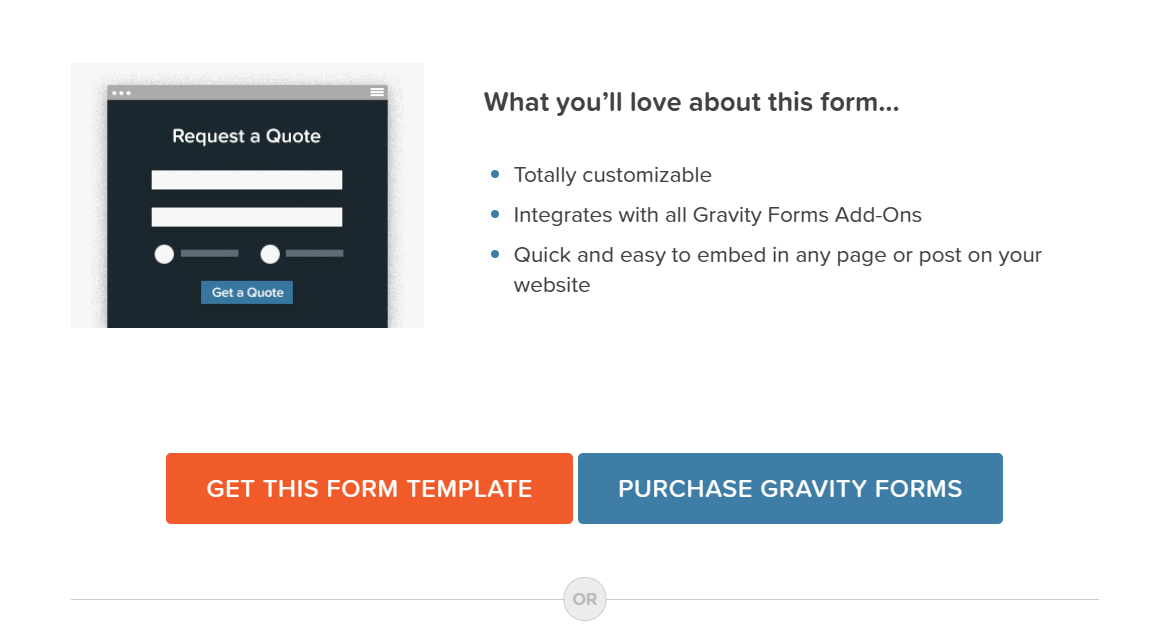
Import the Gravity Forms Webinar Registration Form Template
Within the Gravity Forms Template Library, you will find a pre-built webinar registration form that can be imported and used on your site. This template is totally customizable, and within the form editor you can easily add, edit, or delete any of the form fields, configure field settings, integrate our add-ons, and much more.

To use this template, simply click on the Get this Form Template button at the bottom of the page – the form will then download to your computer as a .JSON file.
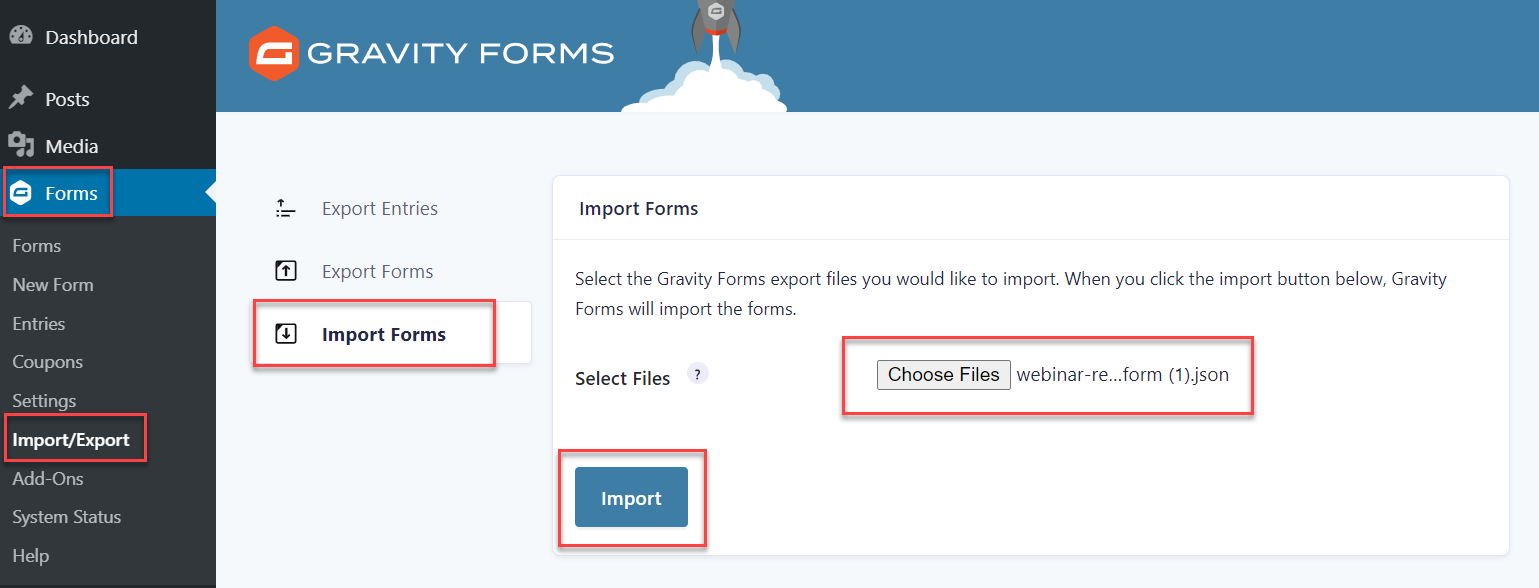
Next, open your WordPress dashboard and select Forms > Import/Export > Import Forms > Choose Files. Select the webinar-registration-from.JSON file from your computer and hit Import.
The webinar registration form template will now be ready to customize within the form editor.
Customize the Personal Information Fields
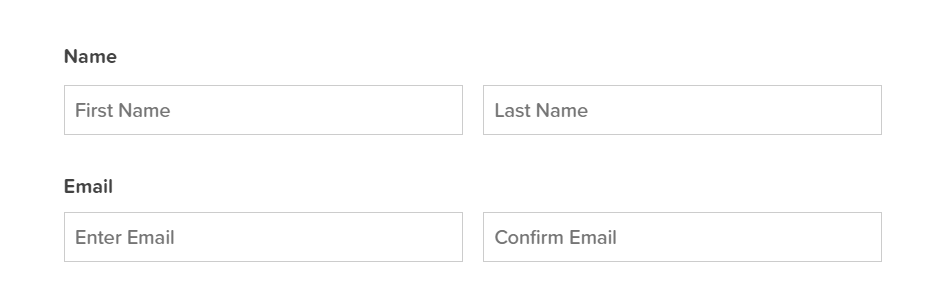
The personal information fields that you display on your form will depend on the information you require from your webinar attendees. Name and Email is a given, but depending on your industry you may want to know other personal information like phone number country of residence.
Key personal information fields can be found within the form editor under Advanced Fields – simply drag-and-drop any field that you need onto the editor canvas.
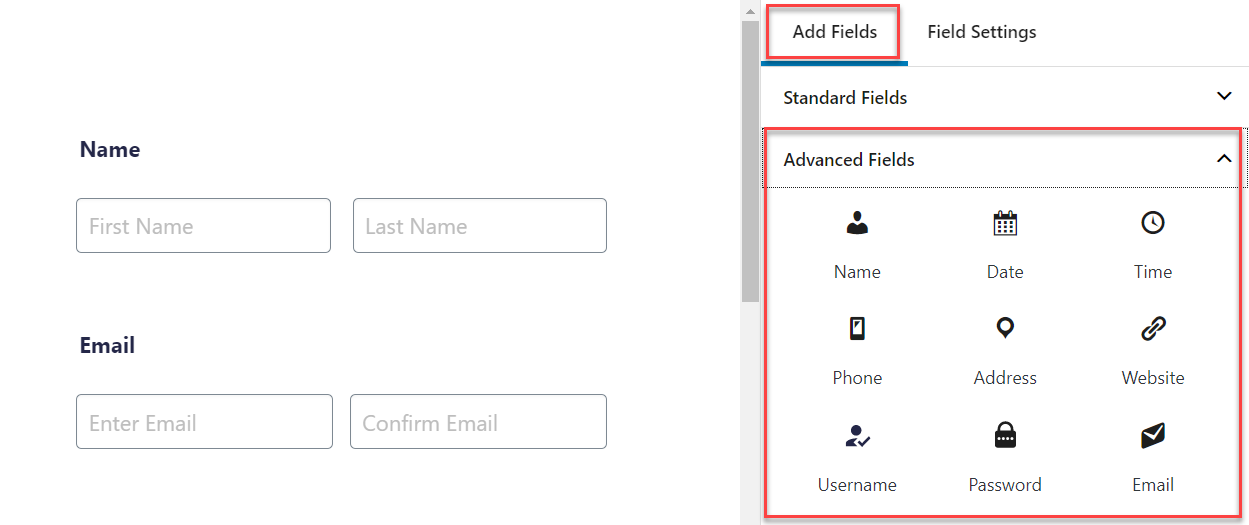
To add Country of Residence, select the Address field and then within the Field Settings, disable all the address fields other than Country. You will now be left with a dropdown box containing a list of countries for your users to select from.
Collect Key Information to Help You Plan a Successful Webinar
As we mentioned, the webinar registration form is a great opportunity to collect key information from your audience, giving you an understanding of your attendees’ background and experience, as well as learn what they want to get out of the webinar.

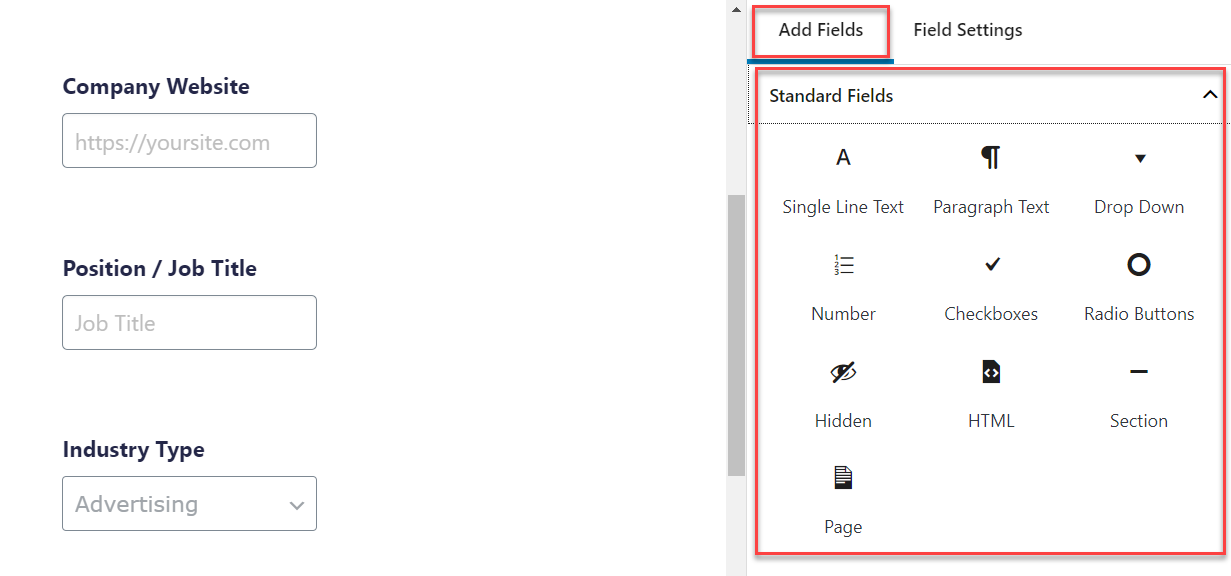
As you can see above, the Gravity Forms webinar template asks for a range of different information, with the first three questions being very industry specific…
- Company Website
- Position/Job Title
- Industry Type
If you aren’t running a webinar for people in business you will want to change these questions to ones that are more relevant to your sphere or delete the fields altogether. For these questions we have used the Website field, Text field, and Dropdown field – if you want to use a different type of field simply select Add Field and then scroll down to browse our list of pre-built fields.
Depending on the questions you want to ask, these fields may be useful to you…
- Paragraph Field – This field allows users to add their own text. It can be useful if you want to get people’s thoughts on a topic, gather more in-depth information on their previous experience, or find out what they are hoping to gain from your webinar.
- Checkbox Field – This field allows users to select more than one option from a list of options. Using this field instead of the paragraph field allows you to push users to consider specific options set by you, instead of just sharing their own thoughts.
- Radio Buttons Field – With this field, users can select only one option from a list, further funneling a user’s response.
We recommend that you keep the last three questions on the webinar registration template form…
- Do you have any questions you would like to ask our speakers?
- How did you hear about this webinar?
- Want to keep up-to-date with our latest news and announcements?
These questions will help you plan out your Q and A segment of the webinar, inform marketing decisions for future online events, and ensure you can keep in contact with your attendees after the webinar.
Of course, you can add, edit, or delete any of the fields on this webinar form template – but a top tip from us would be to not add too many fields. You don’t want the length of the form putting people off signing up for your event.
Get the Most Out of Gravity Forms
Once you’ve created your form, there are still a few (optional) steps that will help you get the most out of Gravity Forms. These include…
- Write a Custom Confirmation Message – With Gravity Forms you can easily write a custom confirmation message to display to your users after form submission. This message could contain further information about your webinar – for example, the date, time, and a link to the event.
- Install an Add-On (or two) – As we discussed, integrating your form with an email marketing service, CRM, or even a payment processor, is all possible with Gravity Forms.
- Integrate with Zapier – The Gravity Forms Zapier Add-On enables you to integrate your form with a wide selection of third-party tools and services. So if there isn’t an official Gravity Forms Add-On for your favorite third-party service, then you might be able to connect with it anyway using Zapier.
Here are a few other useful resources…
- A Case Study: Generating Leads with Gated Content – This case study is a great real-life example of Gravity Forms being used to generate leads via a webinar registration form.
- Certified Add-Ons – Our Certified Add-Ons enable you to do even more with Gravity Forms. Further style your form with add-ons from JetSloth, lock your webinar and other content behind your form with Gravity Wiz, or send users supporting PDF material for your webinar automatically on form submission with Gravity PDF or ForGravity.
- Gravity Forms Documentation – For more information on Gravity Forms, as well as an index of recent ‘How to…’ articles and Starter Guides, check out our docs site.
Are you ready to add a webinar registration form template to your website? Don’t forget to download the form template from our template library!
Not a Gravity Forms customer yet? Sign up for our free demo to check out just how easy it is to create your own forms as well as customize our many form templates.

If you want to keep up-to-date with what’s happening on the blog sign up for the Gravity Forms newsletter!